How to manage your prospecting on Hsabati?
This document will help you better manage your prospects on your Hsabati account.
Creating prospect records
To create a new prospect, follow these steps:
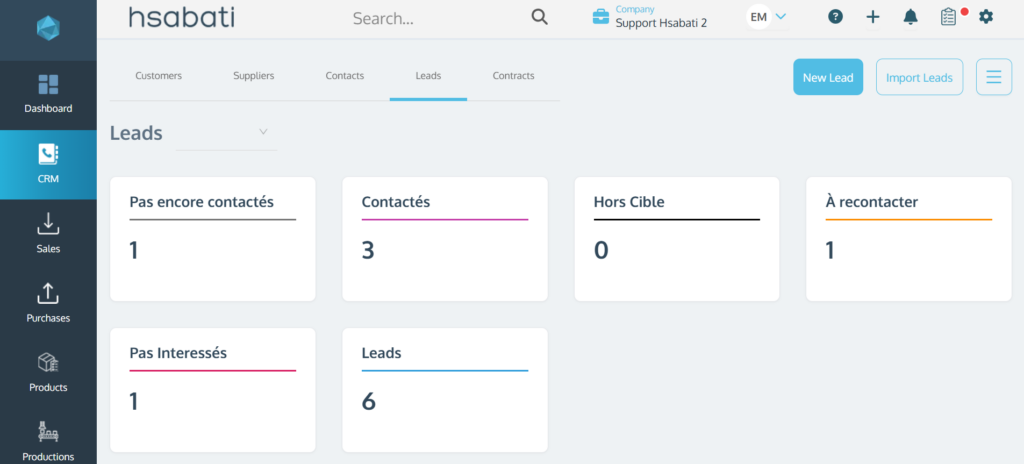
- Go to “CRM” and then “Leads”.
- Click on “New Lead” in the top right corner.
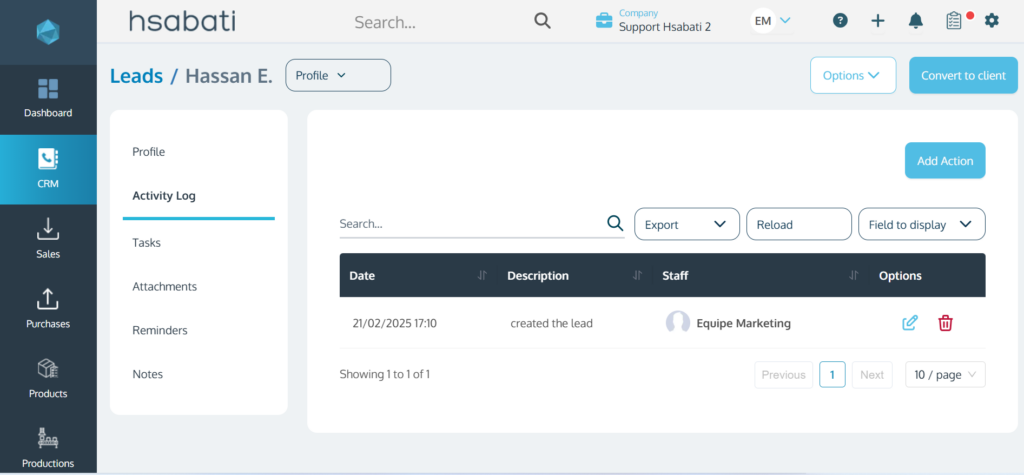
- Fill in the “Lead Profile”, then click “Save” to display additional sections.
- Add interactions with the lead in the “Activity Log” section.
- Create tasks related to the prospect’s record in the “Tasks” section.
- Attach relevant documents in the “Attachments” section.
- Schedule prospect reminders in the “Reminders” section.
- Leave a comment related to the prospect in the “Notes” section.
- Finish by clicking “Save”.
Importing your leads
To import your prospects, follow these steps:
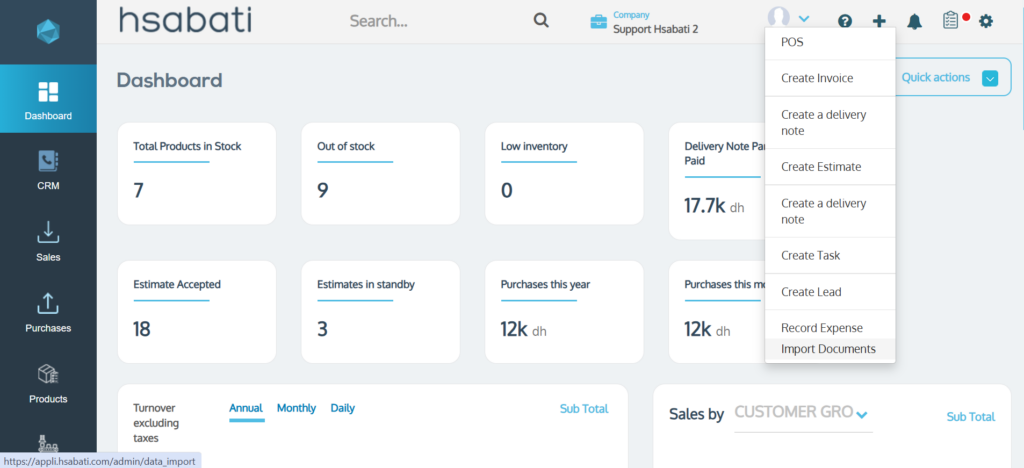
- Click on Dashboard
- Click on the + button (top left)
- Select “Import Documents”
- Click on “Choose a module”. From the dropdown menu, select “Leads”
- Click on “You can import a CSV file” to upload your lead list
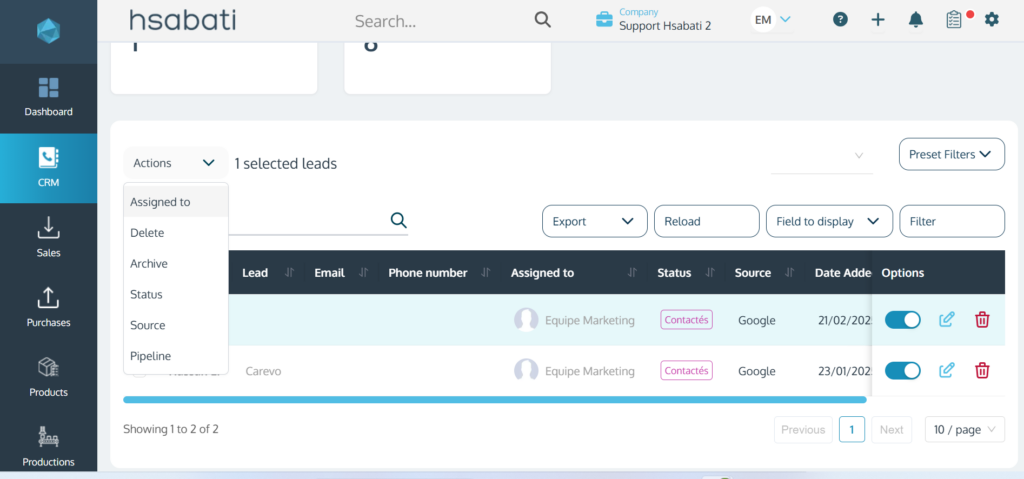
Assigning multiple leads to a collaborator
To assign multiple prospects to a collaborator, follow these steps:
- Go to CRM and then Leads
- Select the desired prospects, then click on the “Actions” button
- In the list, click “Assign to”
- Choose the collaborator and finish by clicking “Save”
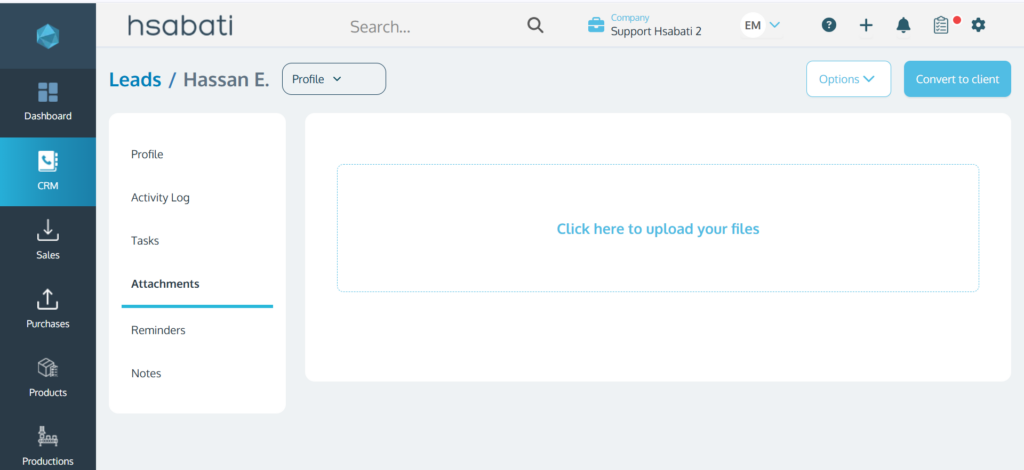
Adding an attachment to a lead
If you want to add an attachment to a prospect but don’t know how, follow these steps:
- Go to CRM
- Click on “Leads”
- Select the corresponding prospect
- Click on “Attachments”
- Click on “Click here to upload your files” and import the file from your gallery
- Finish by clicking “Save”
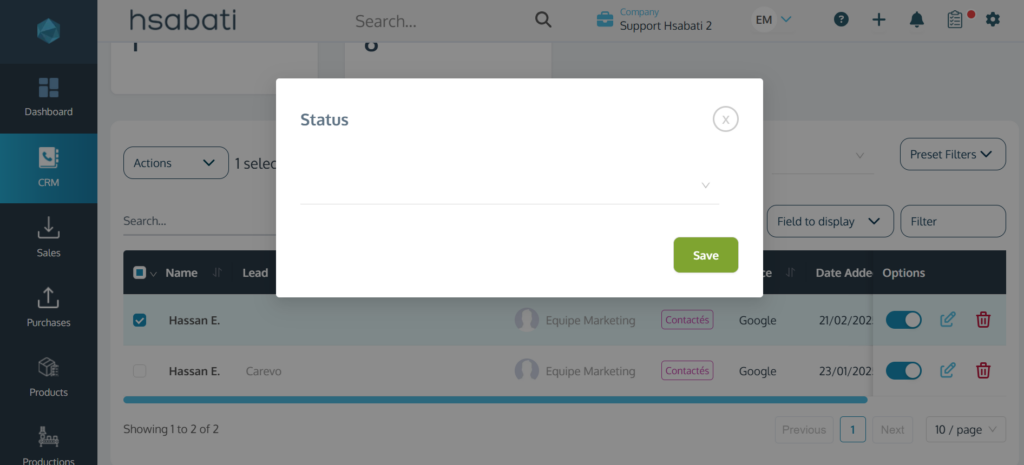
Changing a lead’s status
To change a prospect’s status, follow these steps:
- Click on CRM, then Leads
- Click on the desired lead.
- In the prospect’s information, click on the “Lead Status” in the middle of the page and select the new status
- Finish by clicking “Save”
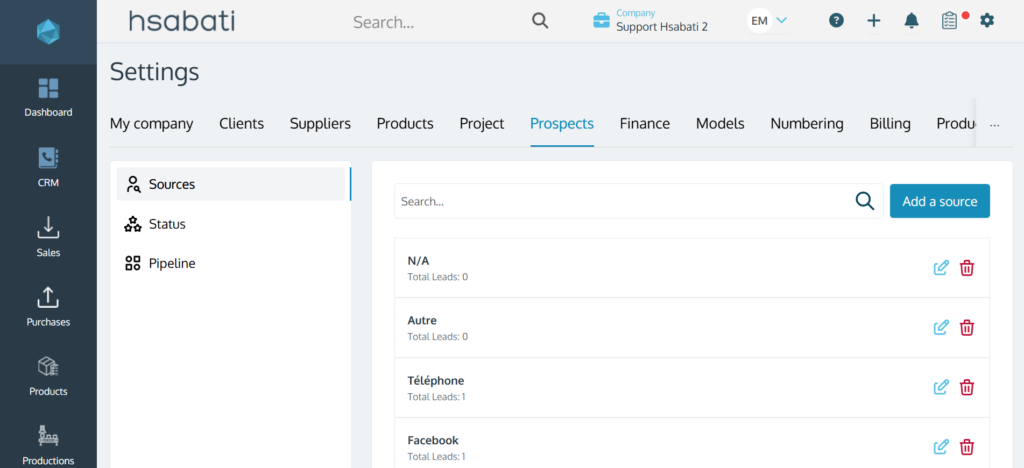
Creating a new lead source
If you want to create a new lead source, follow these simple steps:
- Click on Settings in the top right corner
- Select “Leads”
- Click on “Add a Source” (top right)
- Enter the source name and click “Save”